
Nobody tells beginners that perfect tulip latte art hinges on the right milk texture and steady pouring. If your milk isn’t velvety and smooth, your design won’t hold or look sharp. Focus on controlling your pour speed and angle—slow and steady is better. Practice consistently, and you’ll build muscle memory for clean, layered petals. Keep experimenting with techniques, and you’ll soon master stunning tulip designs that wow every time—there’s more to discover as you continue to refine your skills.
Key Takeaways
- Achieving perfect microfoam is crucial; overly airy or thin foam ruins tulip sharpness.
- Consistent pour height and speed are essential for creating distinct petal layers.
- Proper milk temperature (150°F-155°F) ensures smooth pouring and stable designs.
- Maintaining a steady flow helps shape clean, sharp edges in your tulip pattern.
- Regular practice improves muscle memory, leading to more precise and consistent tulip latte art.
latte art milk frother
As an affiliate, we earn on qualifying purchases.
As an affiliate, we earn on qualifying purchases.
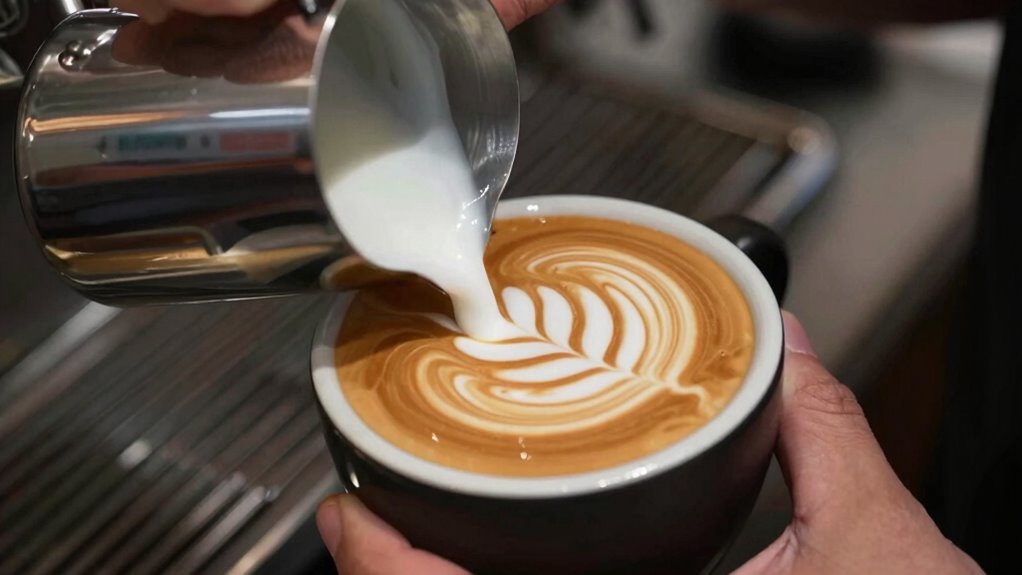
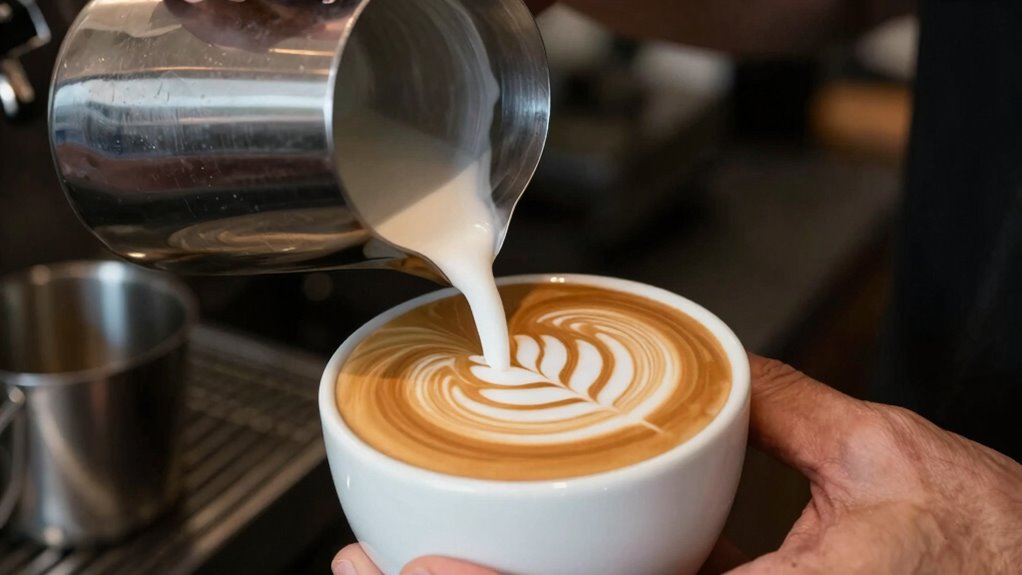
Why Milk Texture Matters for Tulip Latte Art
Have you ever wondered why milk texture is so vital for creating a beautiful tulip in latte art? It all comes down to milk temperature and foam stability. When you steam your milk to the right temperature—around 150°F to 155°F—it creates a smooth, velvety consistency that’s perfect for pouring. Too hot, and the milk becomes thin and less stable; too cold, and it won’t pour smoothly. Additionally, using the right essential DIY tools can help you achieve that perfect steam every time. Achieving the right milk texture is similar to the importance of early socialization for dogs, as both require attention to detail for optimal results. Moreover, the process of steaming can be enhanced by understanding heat transfer principles, which can significantly improve your milk’s texture. Foam stability is equally essential because it ensures the microfoam holds its shape during pouring. If the foam is too airy or unstable, your tulip will look messy or break apart. Achieving the right milk texture allows your designs to flow seamlessly and stay sharp, giving your latte art a polished, professional appearance. Additionally, understanding safety checks before serving your coffee can enhance the overall experience and ensure consistency. A well-prepared drink not only looks good but also contributes to real-world safety by minimizing spills and accidents.
barista milk steaming pitcher
As an affiliate, we earn on qualifying purchases.
As an affiliate, we earn on qualifying purchases.
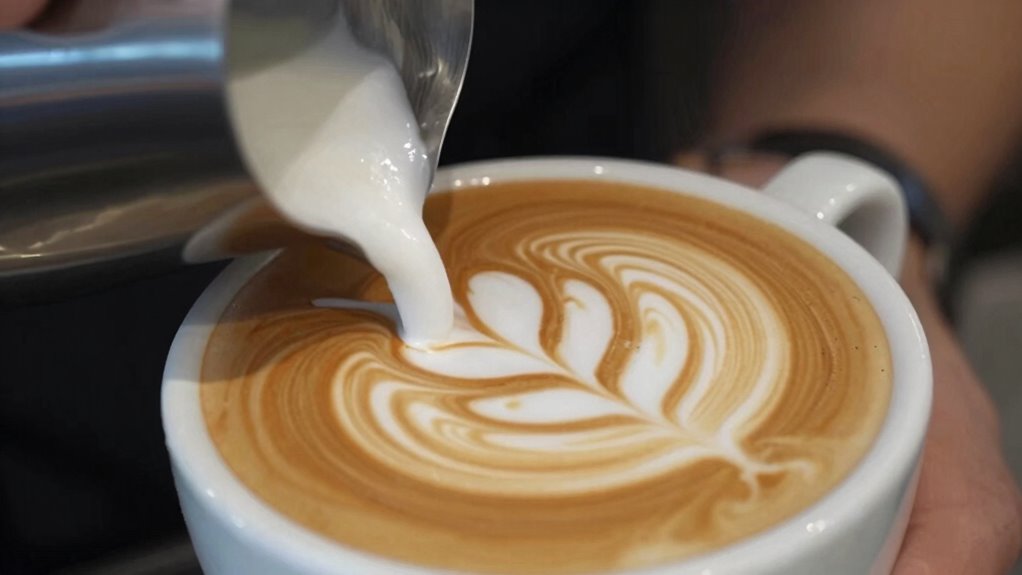
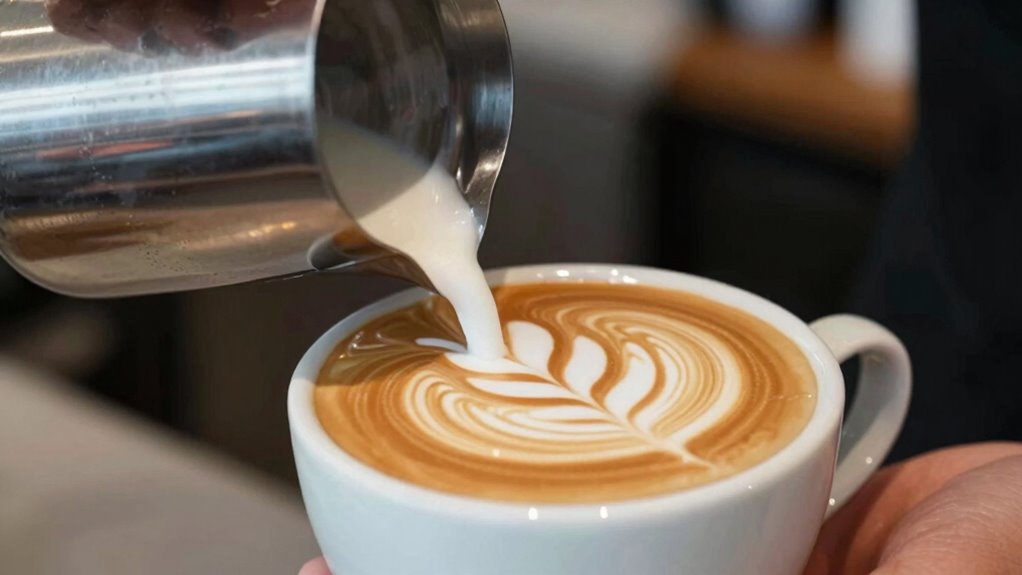
How to Pour for Layered Tulip Petals
Sure! Here’s the revised content with the requested adjustments:
—
Once you’ve achieved the right milk texture, pouring technique becomes your next focus to create layered tulip petals. Proper pour techniques help control the flow and shape of the layers.
- Start by pouring from a higher position to distribute the milk evenly, then lower your pitcher to the surface to begin forming the petals.
- Use gentle, controlled movements, moving your pour side to side to build each layer, allowing the milk frothing to flow smoothly. Mastering pouring techniques will enhance your overall latte art skills.
- Focus on the contrast between the foam and the espresso to guide your pours, creating distinct layers for the tulip petals.
Practicing consistent pour techniques and maintaining the right milk frothing will improve your ability to layer tulip petals beautifully and confidently. Additionally, understanding color accuracy can further enhance the visual appeal of your latte art, making each cup more inviting. Exploring content formats can also inspire creative ways to showcase your latte art journey, making it more engaging for your audience.
—
Let me know if you need anything else!
latte art etching tools
As an affiliate, we earn on qualifying purchases.
As an affiliate, we earn on qualifying purchases.
Common Mistakes and How to Fix Your Tulips
Sure! Here’s the revised content following your instructions:
—
Even experienced baristas make mistakes when creating tulip designs, but recognizing common errors can help you improve quickly. One frequent mistake is poorly steamed milk, which leads to inconsistent microfoam. To fix this, focus on proper milk steaming—aim for a smooth, velvety texture without large bubbles. Additionally, mastering the plant properties of herbalism can enhance your overall focus and creativity while practicing latte art. Another issue is improper pouring techniques; pouring too fast or too high can cause the milk to break through the crema, ruining the design. To improve, try pouring slowly and steadily, maintaining a steady flow. Keep your cup at the right angle and pour from a consistent height. With practice, refining your milk steaming and pouring techniques will help you produce cleaner, more defined tulip shapes every time. Additionally, consider the ambiance of your workspace, as a comfortable environment can enhance your focus and creativity while practicing latte art. Incorporating latest wall art trends can also inspire your latte presentations and elevate the overall experience. Remember, using the right styling cream can help create a more appealing visual when serving your coffee creations. Understanding passive voice detection can also improve the clarity of your coffee-related writing.
—
Let me know if you need any further adjustments!

Subminimal NanoFoamer Lithium Performance Milk Foamer | USB-C Rechargeable, IP4 Waterproof, Dual-Speed, Stainless Steel | Premium Microfoamed Milk in 30 Seconds, Barista-Style Coffee Drinks at Home
High-Performance Power : Cafe-quality microfoamed milk is now possible with a handheld tool! No need for a costly…
As an affiliate, we earn on qualifying purchases.
As an affiliate, we earn on qualifying purchases.
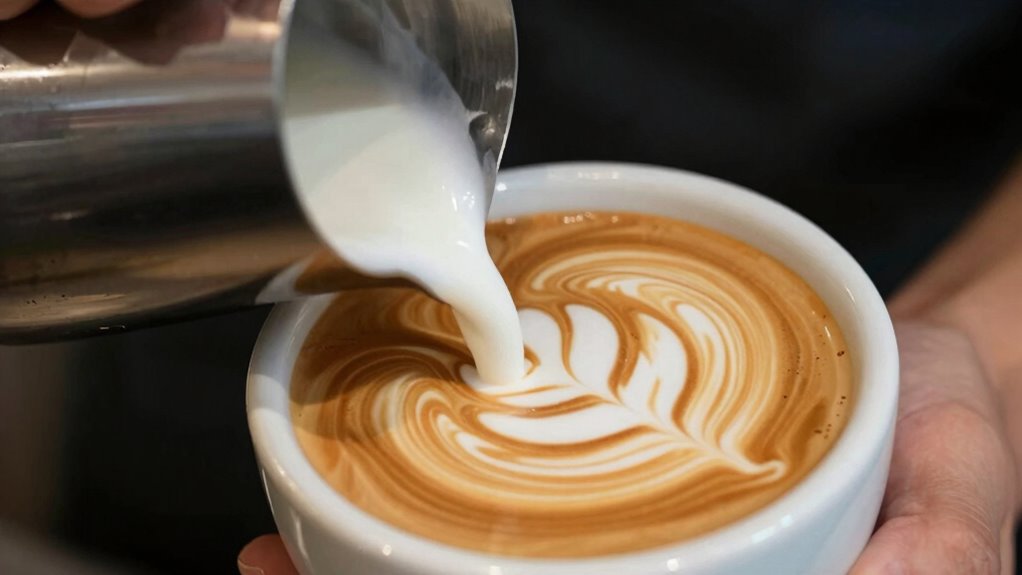
Controlling Pour Speed for Sharp Edges
Certainly! Here’s your modified article subheading content:
—
Controlling your pour speed is essential for creating sharp edges in your tulip design. A steady, controlled pour allows the milk to flow smoothly, helping you shape clean lines. To achieve this, focus on three key points:
- Adjust your pouring temperature – warmer milk flows more quickly, so keep it at the right temperature to maintain control.
- Master milk frothing – properly frothed milk with a glossy, velvety texture pours more predictably, aiding in precision.
- Modulate pour speed – start slow for the initial layers and increase slightly for detail work, ensuring sharp, defined edges. Additionally, consider filter sizing/flow, as the right milk texture can influence your pour consistency.
—
Let me know if you need any further modifications!
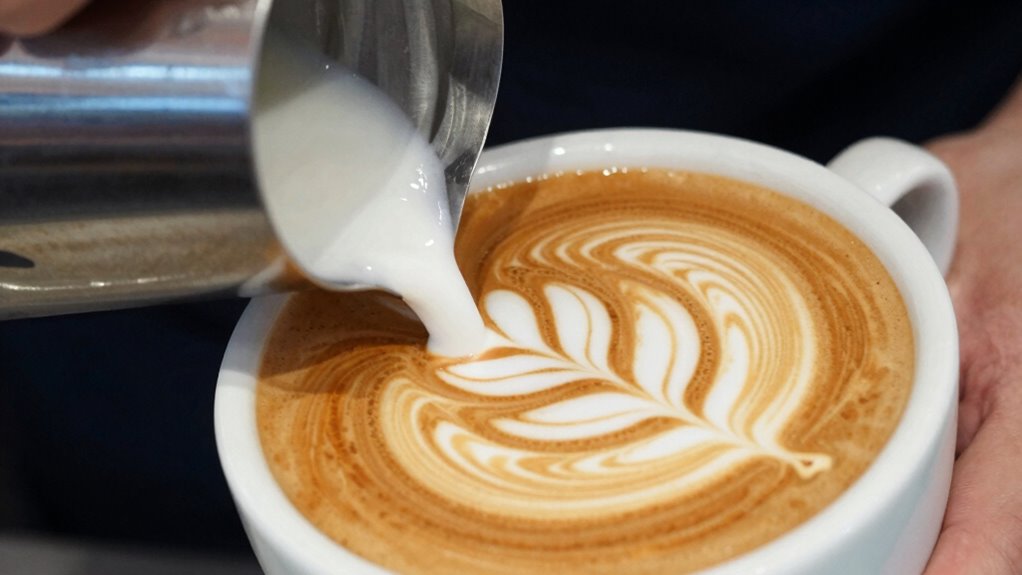
Practicing to Achieve Consistent Tulip Designs
Practicing regularly is the key to producing consistent tulip designs that impress every time. Focus on perfecting your milk frothing techniques to create smooth, glossy microfoam, essential for clean lines and shapes. Pay attention to color contrast by experimenting with different milk and espresso ratios—darker bases make your tulip stand out more vividly. Repetition helps you develop muscle memory, making your pour more controlled and precise. As you practice, observe how slight adjustments in pour height and speed affect your design’s consistency. Remember that knife skills can also translate into precision in your pouring technique, enhancing the overall aesthetic of your latte art. Keep a steady hand, and don’t rush the process. Over time, you’ll notice your tulips becoming more uniform, with sharper edges and balanced color contrast, giving your latte art a professional touch every time. Additionally, incorporating practical lifestyle upgrades into your routine can enhance your overall coffee-making experience.
Frequently Asked Questions
Can I Use Non-Dairy Milk for Tulip Latte Art?
Yes, you can use non-dairy milk for tulip latte art. It may require experimenting with alternative milk textures to find one that steams and froths well. Keep in mind that flavor pairing is important; some non-dairy options like oat or soy milk often produce better foam for detailed designs. With practice, you’ll discover which alternative milk creates the best contrast and stability for your tulip art.
What Tools Can Help Improve My Tulip Design Skills?
To improve your tulip design skills, focus on techniques mastery and milk texture. Use a good steaming pitcher to create smooth, velvety milk, which is essential for precise pouring. Practice controlling your pour speed and angle, and experiment with different pitcher shapes to enhance your technique. Over time, these tools and skills will help you produce more intricate and consistent tulip designs, boosting your confidence and artistry in latte art.
How Long Does It Typically Take to Master Tulip Latte Art?
Mastering tulip latte art is like tending a delicate garden; it takes patience and consistent care. Typically, with dedicated milk frothing techniques and regular latte art practice routines, you can see significant improvement within a few weeks. However, becoming truly skilled may take several months of persistent effort. Keep practicing, refining your technique, and you’ll find your tulips blooming beautifully on every cup.
Is There a Specific Coffee Bean Roast Best for Tulips?
You should choose a medium roast coffee bean for tulip latte art. The best coffee bean selection balances acidity and body, making it easier to create smooth, detailed designs. A medium roast provides the ideal flavor profile and proper crema for pouring. Avoid dark roasts, which can be too oily and hinder latte art, or light roasts, which might lack the richness needed. Your choice of roast level directly impacts your tulip’s clarity and stability.
Can Tulip Latte Art Be Created in Cold or Iced Coffee?
You can create tulip latte art in cold brew or iced lattes, but it’s more challenging than with hot coffee. Cold brew and iced latte milk don’t steam as well, so you need to froth the milk carefully, creating a smooth, velvety microfoam. Practice pouring slowly and steadily to form the tulip design. With patience, you’ll be able to make beautiful tulip latte art even in your cold coffee drinks.
Conclusion
Now that you know the secrets behind creating beautiful tulip latte art, are you ready to practice and make each cup uniquely yours? Remember, mastering tulip designs isn’t about perfection but progress. With patience and attention to technique, you’ll find yourself pouring stunning tulips that wow every time. So, why settle for plain coffee when you can turn each cup into a work of art? Keep pouring, keep practicing, and enjoy the journey!