To master microfoam texture stages, you’ll start by creating frothy milk with big bubbles at around 130°F. Then, as you continue, the bubbles get smaller and denser, reaching a smooth, velvety feel at 140-150°F. Avoid overheating, as large bubbles break down and foam collapses. Perfecting these stages takes practice, but with consistent technique, you’ll produce silky microfoam ideal for latte art and great coffee. Keep going, and you’ll learn more tips to perfect your skill.
Key Takeaways
- Microfoam progresses through stages: frothy (large bubbles), transition (smaller bubbles), and velvety (smooth, glossy foam).
- Velvety microfoam is achieved at 140-150°F with tiny, uniform bubbles for a smooth texture.
- Overheated milk (above 160°F) causes bubbles to burst and foam to collapse.
- Proper technique involves keeping the steam wand just below the milk surface and maintaining steady circular motions.
- Consistent practice and control ensure the microfoam remains silky, glossy, and suitable for latte art.

Milk Frothing Pitcher 350ml/600ml/900ml/1500ml (12oz/20oz/32oz/50oz) Steaming Pitchers Stainless Steel Milk/Coffee/Cappuccino/Latte Art Barista Steam Pitchers Milk Jug Cup with Art Pen,12oz
Perfect Combination Of Milk Frothing Pitcher And Latte Art Pen: The milk frother jug can be used in…
As an affiliate, we earn on qualifying purchases.
As an affiliate, we earn on qualifying purchases.
What Is Microfoam and Why Is It Key to Great Coffee?
Have you ever wondered what makes a perfect cappuccino or latte? It all comes down to microfoam, a vital element that enhances both coffee flavor and milk chemistry. Microfoam is the velvety, fine-textured milk that integrates smoothly with espresso, creating a balanced taste and smooth mouthfeel. When milk is steamed correctly, its proteins and fats interact to produce this silky foam, preserving the natural sweetness of the milk. This foam isn’t just decorative—it influences how flavors meld and how the drink feels in your mouth. Achieving the right microfoam means understanding milk chemistry and how to manipulate it through steaming. When done well, it elevates your coffee experience, delivering richness and complexity with every sip. Furthermore, just as color accuracy impacts image quality in projectors, achieving the right microfoam is crucial for enhancing the overall flavor profile of your coffee.

Ecoflarix Large Capacity Milk Frother: 4-in-1 Electric Milk Steamer 350ml, 7700RPM High Speed, 120s Fast Frothing, 𝐇𝐨𝐭 & 𝐂𝐨𝐥𝐝 Foam Maker, Helpful Stainless Steel for Latte – Grayish Black
Professional Barista Performance: Experience café-quality results with our advanced Milk Frother featuring 450W high power and 6000rpm motor…
As an affiliate, we earn on qualifying purchases.
As an affiliate, we earn on qualifying purchases.
Step-by-Step: How to Create Microfoam in Your Milk
To create perfect microfoam, start by selecting the right milk—ideally whole or 2%—for a creamy texture. Use proper steaming techniques to introduce air gradually, ensuring the milk heats evenly without large bubbles. Focusing on achieving smooth, velvety microfoam that seamlessly integrates into your espresso for a professional finish is essential, as it can enhance overall beverage quality. Additionally, incorporating sound vibrations can help create a calming atmosphere, which may improve your focus while steaming. Investing in a high-quality luxury steaming equipment can greatly enhance your microfoam-making experience, as using sustainable practices in your preparation can also contribute positively to the environment. Remember, utilizing mythology-inspired names can also provide a unique touch to your beverage offerings, making them more memorable for customers.
Selecting the Right Milk
Sure! Here’s the revised content with the requested modifications:
—
Wondering which milk works best for creating smooth microfoam? The answer depends on your taste and dietary needs. Whole milk produces rich, creamy microfoam, perfect for classic lattes. If you’re vegan or dairy-free, milk alternatives like oat, almond, or soy milk can work well, but each has unique textures. Some might need extra flavor enhancements to achieve the desired foam consistency. Additionally, essential oils for toothache relief can help soothe discomfort that might distract you from perfecting your microfoam. Ethical choices in consumer products can also influence your decision on which milk to use. Exploring content formats in digital research can enhance your understanding of how different milks behave under steam. Here’s a quick comparison:
| Milk Type | Microfoam Quality | Flavor Enhancements |
|---|---|---|
| Whole Milk | Creamy, stable microfoam | Sweeteners, cocoa |
| Oat Milk | Velvety, good for microfoam | Vanilla, cinnamon |
| Almond Milk | Light, less stable foam | Honey, spices |
Additionally, proper steaming techniques can significantly impact the quality of your microfoam. Electric dirt bikes can produce 10 to 20 horsepower, enhancing performance just like precise steaming techniques enhance your milk. Choose based on your preference and experiment for the best microfoam!
—
Let me know if you need any further modifications!
Proper Steaming Technique
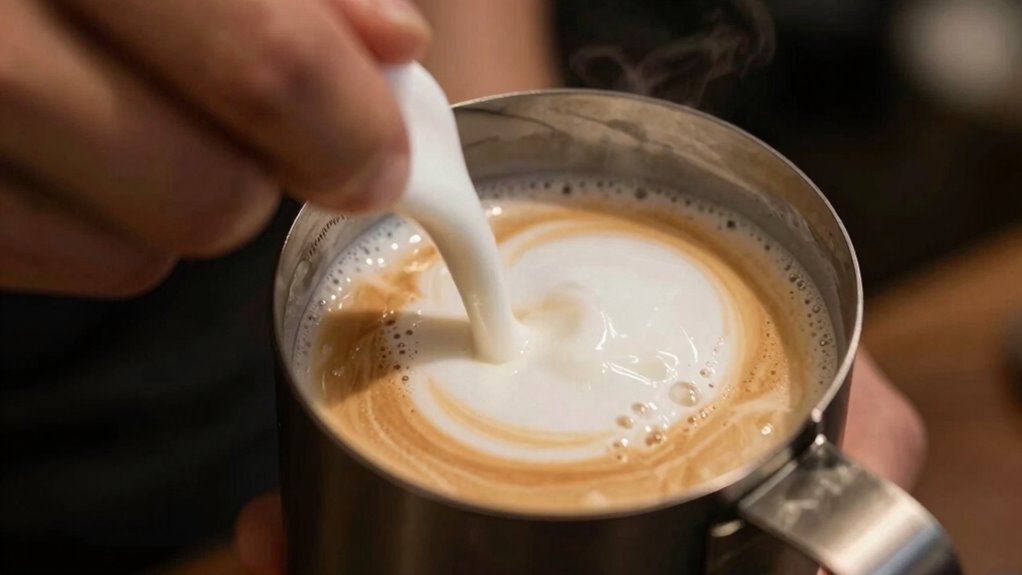
Mastering the proper steaming technique is essential for creating smooth, velvety microfoam. To do this, start by filling your steaming pitcher about one-third full with milk. Position the steam wand just below the surface, aiming to introduce air gently. Keep the milk temperature in mind—ideally around 140-150°F—so you don’t overheat it. Use steady, circular steaming pitcher techniques to evenly heat and aerate the milk, avoiding large bubbles. Maintain a slight tilt to keep the wand’s tip near the surface, creating the microfoam texture you want. As the milk heats, lower the pitcher to keep the wand’s tip submerged, then turn off the steam once the desired temperature is reached. Practice consistent movements for the best microfoam results.
Achieving Smooth Microfoam
Creating smooth microfoam starts with positioning your steam wand correctly and controlling your movements. Keep the wand just below the milk’s surface, creating a gentle hiss as you introduce air. As the milk begins to expand, lower the wand slightly to focus on heating and texturing. Use your milk frothing tools to maintain steady, circular motions, ensuring an even, velvety consistency. The goal is a silky microfoam that enhances flavor without large bubbles or foam peaks. Consistent control over your technique results in a uniform texture that improves the overall taste and presentation of your coffee. Smooth microfoam not only looks appealing but also boosts flavor enhancement by blending seamlessly into espresso. Practice patience and precision, and your milk will transform into perfect microfoam every time.
Milk Frothing Pitcher 350ml/600ml/900ml/1500ml (12oz/20oz/32oz/50oz) Steaming Pitchers Stainless Steel Milk/Coffee/Cappuccino/Latte Art Barista Steam Pitchers Milk Jug Cup with Art Pen,12oz
Perfect Combination Of Milk Frothing Pitcher And Latte Art Pen: The milk frother jug can be used in…
As an affiliate, we earn on qualifying purchases.
As an affiliate, we earn on qualifying purchases.
The Stages of Microfoam: From Frothy to Velvety Milk
The Stages of Microfoam: From Frothy to Velvety Milk
Understanding the progression of microfoam is essential for crafting the perfect latte art or achieving that smooth, creamy texture in your drinks. As you steam milk, it evolves through stages, from frothy to velvety. Initially, the milk is bubbly and frothy, with large air bubbles. As you continue, the foam becomes denser and more stable, with smaller bubbles. The ideal stage is when the milk reaches about 140-150°F, where foam stability peaks, and the texture turns velvety. This stage guarantees the microfoam is smooth and glossy, perfect for pouring latte art. Proper steaming techniques are crucial for achieving the best results, ensuring the milk is heated evenly without overheating. Timing and temperature control are key to progressing through these stages successfully. Additionally, incorporating gratitude practices can enhance your overall coffee experience, making each cup feel more special. Moreover, understanding the science of steaming can further enhance your skills in creating the perfect microfoam, as it involves mastering the brewing fundamentals that govern temperature and foam texture. A good espresso machine can also play a significant role in producing consistent microfoam, ensuring that the milk is steamed to perfection.
| Stage | Characteristics | Milk Temperature | Foam Stability |
|---|---|---|---|
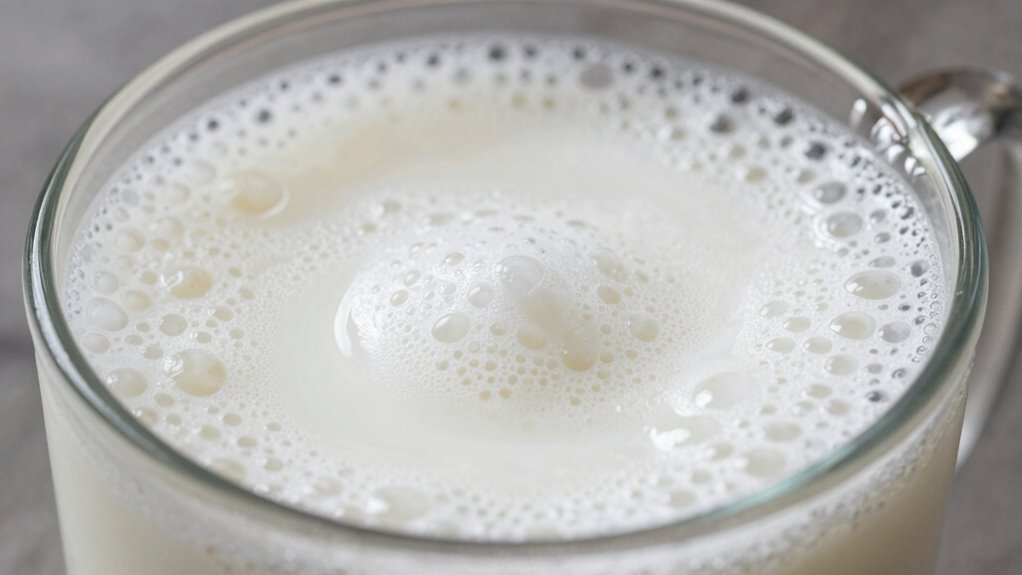
| Frothy | Large bubbles, airy | 130°F | Low |
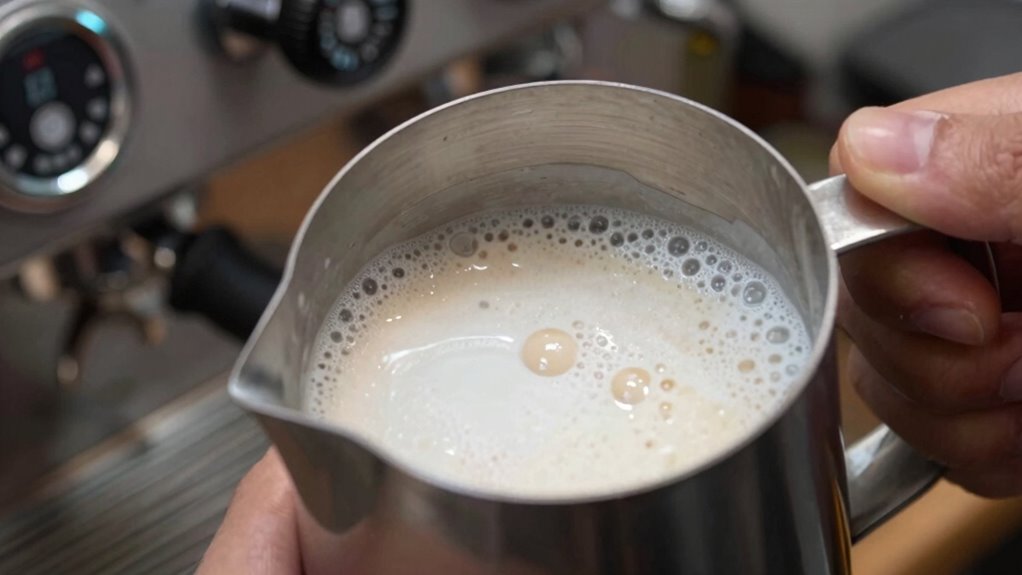
| Transition | Smaller bubbles, denser | 135°F | Improving |
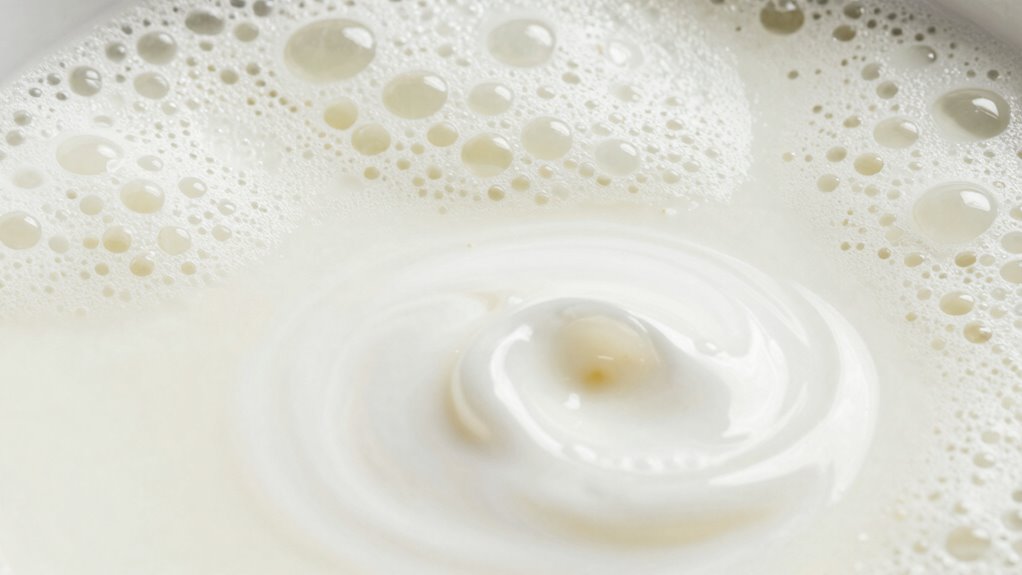
| Velvety | Smooth, glossy, uniform microfoam | 140-150°F | High |
| Optimal Pouring | Perfect consistency for latte art | 140-150°F | Very stable |
| Overheated | Bubbles burst, foam collapses | >160°F | Reduced |

YBEATY 2PCS Latte Art Pen Set Coffee Drawing Tool with Wood Handle Latte Art Pen with Coffee ArtStencils Double-Ended Barista Accessories for CoffeeBar Creating Professional Espresso Tools Home Cafe
【What You Will Receive】Our barista tools contains 2 latte art pens, meeting daily coffee pattern outlining and detail…
As an affiliate, we earn on qualifying purchases.
As an affiliate, we earn on qualifying purchases.
Troubleshooting Common Microfoam Problems
When you’re creating microfoam, you might notice issues like excessive bubbles, uneven texture, or not enough microfoam. These problems can affect the overall quality of your milk, but they’re often easy to fix. Let’s explore how to troubleshoot these common microfoam challenges effectively. Remember, being aware of real-world safety can also apply to your coffee-making environment, ensuring you have a safe and pleasant experience. Additionally, using the correct straining techniques can significantly improve the texture of your microfoam. One effective solution is to ensure your steam wand is positioned correctly to create the right angle for optimal foam production. A good practice is to monitor air quality benefits while steaming, as this can enhance the overall experience of your coffee-making process. Maintaining a clean steam wand is essential for achieving consistent microfoam quality, ensuring that every cup tastes just right.
Excessive Bubbles Formation
Excessive bubbles in your microfoam can undermine its smooth, velvety texture and make it difficult to pour latte art. When foam isn’t stable, it tends to have large, uneven bubbles that compromise the microfoam’s quality. To fix this, focus on improving foam stability by controlling your milk temperature and steam pressure. Overheating milk can cause larger bubbles and reduce foam consistency. Additionally, pay attention to bubble size—smaller, uniform bubbles create a more refined microfoam. Properly textured milk should have a glossy, paint-like appearance with fine, consistent bubbles. If bubbles are too big or numerous, gently tap the pitcher and swirl the milk to encourage bubble collapse and even out the foam. This helps maintain foam stability and achieve a smoother, more enjoyable microfoam.
Inconsistent Foam Texture
Inconsistent foam texture often results from variations in technique or milk preparation, making it challenging to achieve a smooth, uniform microfoam. When your foam’s consistency fluctuates, you notice texture variation—some areas are frothy, others too thick or thin. This usually happens if you change your steaming angle, speed, or milk temperature without consistency. To fix this, focus on maintaining steady steam wand positioning and control, ensuring even heat transfer and air incorporation. Use the same milk type and quantity each time to reduce variability. Properly textured milk should have a silky, velvety feel, with uniform foam throughout. Consistently practicing your technique will help you develop a more predictable foam consistency, reducing texture variation and resulting in a smoother, more professional microfoam. Additionally, understanding piercing care and hygiene is crucial to prevent infections, which can disrupt your focus during coffee preparation. Incorporating natural light into your brewing area can also enhance your overall coffee experience, promoting a more inviting and cozy atmosphere. A well-maintained small wood stove can also contribute to a more enjoyable coffee brewing environment by providing consistent heat. Additionally, maintaining ethics in AI can guide the use of technology in coffee brewing, ensuring a balance between innovation and user experience.
Insufficient Microfoam Steaming
If your milk isn’t producing enough microfoam, it’s likely due to issues with your steaming technique or milk temperature. Insufficient microfoam can affect foam stability and make it harder to create a smooth, velvety texture. To fix this, check these factors:
- Confirm your steam wand is positioned correctly at the milk’s surface for proper aeration.
- Maintain consistent temperature control, aiming for around 140°F (60°C).
- Avoid over-steaming, which can heat the milk too quickly and reduce foam quality.
- Use fresh, cold milk, as older or warm milk won’t foam as well.
Adjusting these variables helps improve foam stability and creates the perfect microfoam for your latte art or drinks. Proper technique and temperature control are key to consistent microfoam.
Tips to Practice and Perfect Your Microfoam Texture

Mastering microfoam texture takes practice, but focusing on a few key techniques can make a big difference. First, pay attention to your equipment maintenance; clean your steam wand regularly to prevent milk residue that can affect texture. Practice controlling your steam pressure and angle to create smooth, shiny microfoam. Experiment with flavor pairing by adjusting milk temperature and texture to complement different coffee flavors, enhancing overall taste. Use a thermometer to monitor milk temperature, ensuring consistency. Keep your pitcher at the right angle and position the steam wand just below the surface of the milk to achieve fine microfoam. Consistent practice with these tips will help you develop better control, leading to perfectly textured microfoam every time.
Using Microfoam to Make Beautiful Latte Art
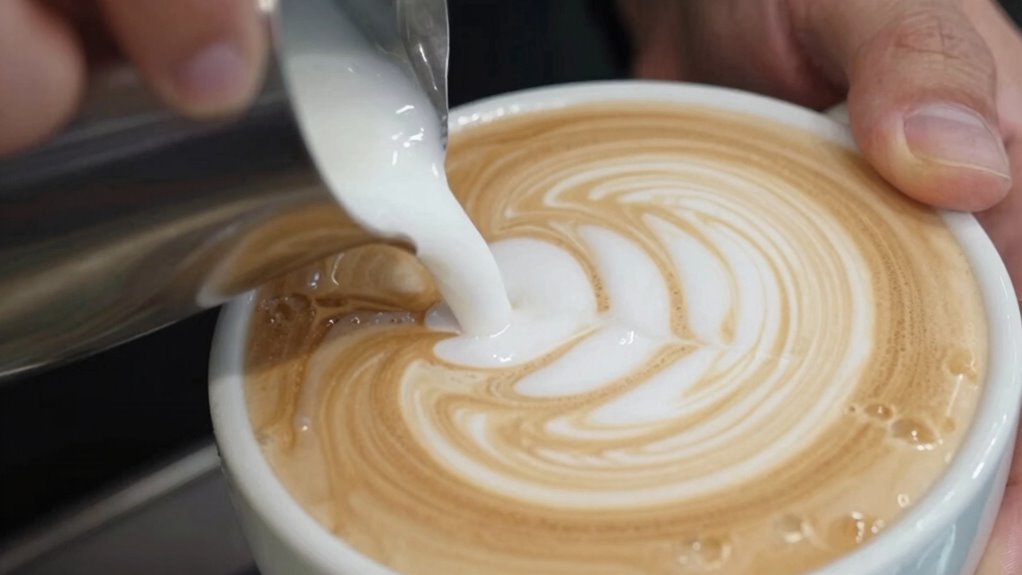
Once you’ve perfected your microfoam, you can transform a simple latte into a work of art. Using your microfoam, you can create stunning designs like hearts, rosettas, or tulips. The key is controlling the flow of milk and understanding the texture you’ve achieved. Different coffee bean varieties can influence the contrast and color of your latte art, so choose wisely. Make sure to use appropriate milk frothing tools—steam wands or frothing pitchers—to get smooth, shiny microfoam. Practice pouring slowly and steadily, starting from a higher distance and moving closer to the surface as you shape your design. Focus on consistency and patience. With practice, your latte art will become more intricate and impressive.
Frequently Asked Questions
What Types of Milk Are Best for Microfoam?
You’re best off using whole milk for microfoam because its fat content creates smooth, creamy foam. However, alternative milk like oat, soy, or almond can also work well with the right frothing tools, though they may produce slightly different textures. For best results, use a steam wand or frothing pitcher, and experiment to find which milk type and frothing technique give you the perfect microfoam for your coffee art.
How Does Temperature Affect Microfoam Quality?
When you steam milk, temperature plays a vital role in foam stability and overall microfoam quality. If you heat the milk too much, it can scald, causing the foam to become coarse and less stable. Ideally, aim for around 150°F to 155°F, as this creates a glossy, smooth microfoam that’s stable and perfect for latte art. Proper temperature regulation guarantees your milk steaming results in consistent, velvety microfoam every time.
Can Non-Dairy Milks Produce Good Microfoam?
Yes, non-dairy milks can produce good microfoam, but it depends on the type and how you froth them. Vegan alternatives like oat, almond, and soy milk often froth well when heated properly and frothed with the right technique. Milk frothing for these alternatives requires a bit of practice to achieve smooth, velvety microfoam, but with patience, you can make delicious, café-quality drinks using plant-based milks.
How Long Does It Take to Master Microfoam Techniques?
It typically takes beginners about 20 to 30 hours of dedicated milk frothing practice to master microfoam techniques, according to industry insights. Your skill in milk frothing directly impacts the quality of latte art, making it more intricate and appealing. Consistent practice helps you understand milk texture stages better, so you can produce smooth, glossy microfoam every time, ultimately elevating your coffee presentation and customer experience.
Is Microfoam Essential for All Coffee Drinks?
Microfoam isn’t essential for all coffee drinks, but it’s vital for creating latte art and smooth milk steaming. When you make drinks like lattes or cappuccinos, microfoam helps you pour beautiful designs and achieve the right texture. For black coffee or drip brews, microfoam isn’t necessary. However, mastering milk steaming and achieving consistent microfoam elevates your coffee game, making drinks look better and taste smoother.
Conclusion
Mastering microfoam might not turn you into a barista overnight, but with patience and practice, you’ll craft velvety milk that elevates your coffee game. Think of it as honing your skills like a knight sharpening his sword—each attempt gets you closer to perfection. Don’t be discouraged by early mishaps; remember, even the most legendary brewers started with humble beginnings. Keep frothing, and soon, your latte art will impress even the most discerning of modern-day coffee connoisseurs.