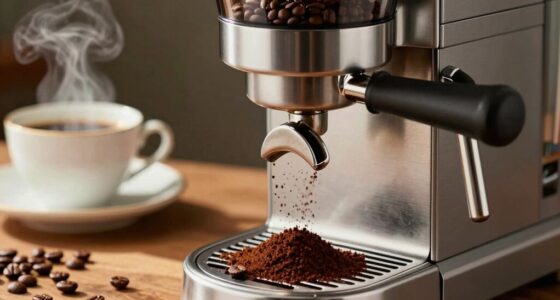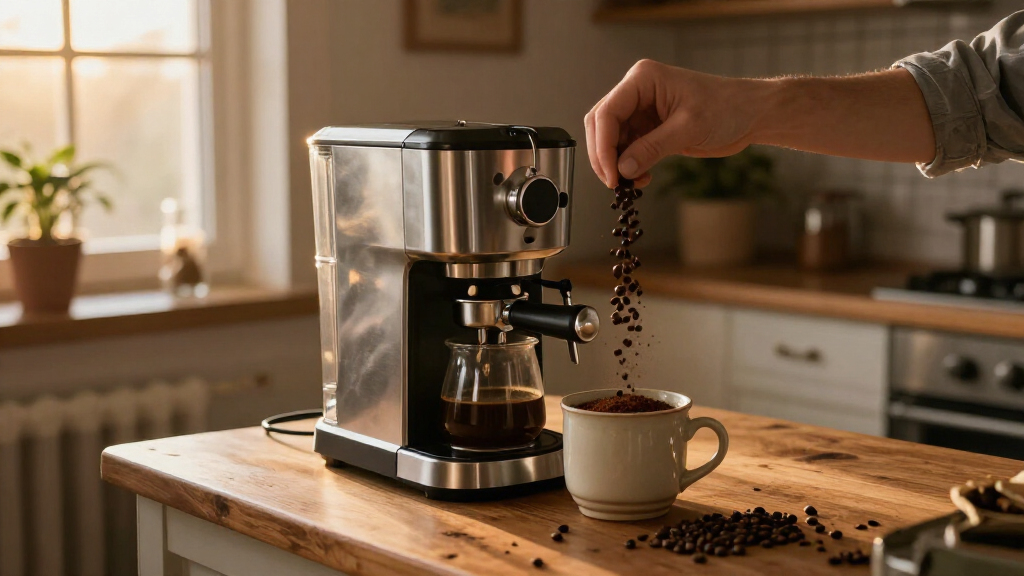
Use this guide to set up a drip coffee maker with a built-in grinder, choose a starting grind and coffee amount, brew a pot, and clean the machine. It is for beginners using a new or unfamiliar automatic drip model. Allow about 20-30 minutes for setup and the first brew; later pots take less time.

Get coffee and tea gear delivered free with Prime
- Fast, free delivery on millions of items
- Prime Video, Amazon Music and more included
- Member-only deals all year
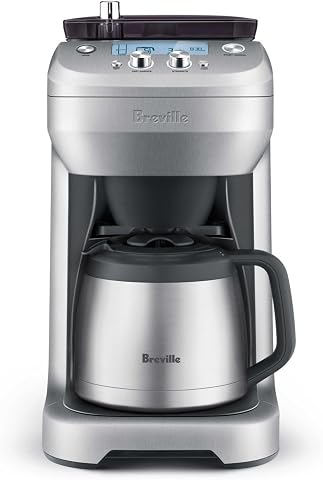
Breville Grind Control Drip Coffee Maker with Thermal Carafe
- ✔ Coffee maker type: Automatic drip
- ✔ Grinder: Integrated adjustable stainless steel burr grinder
- ✔ Strength settings: 8

Cuisinart DGB-400NAS 12-Cup Automatic Grind & Brew Coffee Maker
- ✔ Coffee maker type: Automatic drip
- ✔ Capacity: 12 cups, approximately 5 oz per cup
- ✔ Grinder: Built-in blade grinder

Horavie Single-Serve Coffee Maker with Built-In Grinder
- ✔ Model: CGM521
- ✔ Brew types: Whole beans, ground coffee, or K-Cup pods
- ✔ Grind settings: 6 settings, 6–16 seconds
Difficulty: Beginner | Time: 20-30 minutes
What You’ll Need
Tools & Materials:
- Drip coffee maker with built-in grinder and its manual
- Whole coffee beans
- Fresh, cold drinking water
- Compatible filter, if the model requires one
- Coffee mug or carafe
Knowledge:
- Basic use of household electrical appliances
- How to identify the machine’s water reservoir, bean hopper, filter basket, and controls
Check the manual for model-specific instructions, including the approved filter type, maximum bean and water levels, and whether the grinder can be disabled. Keep the machine unplugged while inspecting or cleaning its parts. Do not put water in the bean hopper or pour beans into the water reservoir.
Breville Grind Control Drip Coffee Maker with Thermal Carafe
The Breville Grind Control is our strongest choice when the grinder itself is a priority. Its integrated adjustable stainless steel burr grinder gives us more direct control over grind size than the Cuisinart’s blade grinder, while eight strength settings let us tune the resulting brew. That combination makes it better suited to people who want to refine a regular drip routine rather than simply automate bean-to-pot brewing.Its flexibility extends beyond a full carafe: we can brew for a cup or travel mug, and the thermal carafe avoids relying on a glass pot for serving. A half-pound hopper and 60-ounce water tank also support repeated brewing between refills. Against those benefits, the Breville is the tallest and heaviest option here, and its listed limited warranty is one year, shorter than Cuisinart’s three-year coverage. Buyers who want a simpler programmable carafe may find the Cuisinart a more practical fit; the Breville earns its premium role through grind and strength adjustment.
Pros:
- Adjustable stainless steel burr grinder
- Eight strength settings for brew customization
- Can brew into a carafe, cup, or travel mug
- Thermal carafe and programmable auto start
Cons:
- At 16.3 inches tall and 16.1 pounds, it needs more room than the other picks
- One-year limited warranty is shorter than Cuisinart’s stated coverage
- Listed voltage is 110–120 V, so buyers should confirm it fits their setup
Best for: Coffee drinkers who want adjustable burr grinding, multiple strength settings, and drip brewing for a cup, travel mug, or carafe.
Not ideal for: Buyers with limited counter clearance or those who prefer a lighter, simpler machine with a longer listed warranty.
Bottom line: We recommend the Breville when control over grind and brew strength is worth the larger footprint.
“We recommend the Breville when control over grind and brew strength is worth the larger footprint.”
Cuisinart DGB-400NAS 12-Cup Automatic Grind & Brew Coffee Maker
The Cuisinart DGB-400NAS is the straightforward carafe pick for mornings when we want the machine to grind and brew on a schedule. Its 24-hour programmable timer, 1–4 cup setting, and Brew Pause cover practical daily needs without the more involved grind and strength controls offered by the Breville. We can also turn grinding off and use pre-ground coffee, giving the Cuisinart an easy fallback if we run out of beans.That convenience comes with an important grinder tradeoff: this model uses a blade grinder, not the adjustable burr system in the Breville. The stated 12-cup capacity is based on cups of about five ounces, so we should not read it as twelve large mugs. Its glass carafe and reusable gold-tone filter keep the familiar drip setup simple, while the charcoal water filter adds another replaceable component to maintain. Compared with Horavie, it is the better choice for a shared pot and scheduled brewing; it is less suited to varied single-cup formats.
Pros:
- 24-hour programmable brewing
- Grind-off option accommodates pre-ground coffee
- 1–4 cup setting and Brew Pause add serving flexibility
- Reusable gold-tone filter and charcoal water filter included
Cons:
- Blade grinder offers less grind control than the Breville’s adjustable burr grinder
- 12-cup capacity uses approximately 5-ounce cups
- Glass carafe does not provide the thermal serving style of the Breville
Best for: Households that want a scheduled drip pot, a smaller 1–4 cup setting, and the option to brew with pre-ground coffee.
Not ideal for: Buyers seeking burr-grinder adjustability, a thermal carafe, or single-serve compatibility with pods.
Bottom line: We’d choose the Cuisinart for simple scheduled carafe brewing and flexible use of whole or pre-ground coffee.
“We’d choose the Cuisinart for simple scheduled carafe brewing and flexible use of whole or pre-ground coffee.”
Horavie Single-Serve Coffee Maker with Built-In Grinder
The Horavie CGM521 takes a different approach from both drip-carafe picks: it is built around an individual serving, with options for whole beans, ground coffee, or K-Cup pods. That range is its defining advantage. We can choose freshly ground beans when flavor and aroma are the priority, then use pods or grounds when speed, convenience, or household preferences call for another format. The Breville and Cuisinart focus on drip brewing and do not offer this same pod flexibility.Six brew sizes from 6 to 16 ounces and a 47-ounce removable tank make it practical for more than one drink between refills. The drip tray accommodates cups up to 6.89 inches tall, which helps with taller travel cups. But the grinder is described through six timed settings of 6–16 seconds, not the adjustable burr control found on the Breville. We also have conflicting compact-design measurements in the supplied description and listed dimensions, so we should check the machine’s actual fit before setting aside counter space. It suits format flexibility better than precision grinding.
Pros:
- Brews whole beans, ground coffee, and K-Cup pods
- Six brew sizes from 6 to 16 ounces
- Six timed grinder settings
- Removable 47-ounce tank and tray for cups up to 6.89 inches tall
Cons:
- Timed grinding offers less grind-size detail than the Breville’s adjustable burr grinder
- Description and listed dimensions differ on compact-design measurements
- Single-serve format does not replace a carafe for serving a group
Best for: Single-cup drinkers who want to switch among freshly ground beans, pre-ground coffee, and K-Cup pods.
Not ideal for: Buyers who mainly serve several people from one pot or want clearly specified adjustable burr-grinder control.
Bottom line: We’d pick the Horavie when one-cup convenience and three coffee formats outweigh carafe capacity and finer grind control.
“We’d pick the Horavie when one-cup convenience and three coffee formats outweigh carafe capacity and finer grind control.”
As an Amazon Associate we earn from qualifying purchases.
Before You Start
Place the coffee maker on a stable, dry, level surface near an outlet. Leave space above it for the hopper lid and water reservoir, and keep the machine clear of stovetops, sinks, and edges. Remove packaging and check that the carafe, filter basket, and any removable grinder parts are present. If the manual calls for a first-use rinse or cleaning cycle, complete that before brewing coffee.
Use the machine’s marked cup or water measurements when setting a batch size. A machine’s cup marking may be smaller than a standard mug. Never fill beyond the maximum line, and do not operate the grinder while its lid or other required safety cover is open.
Step-by-Step Instructions
Step 1: Inspect and rinse the removable parts
Unplug the coffee maker. Remove the carafe, filter basket, and any other parts the manual identifies as removable. Wash them with warm water and mild dish soap if permitted, then rinse and dry them. Wipe the exterior with a damp cloth. Follow the manual if it specifies a first-use cleaning cycle, and do not submerge the machine or its electrical base.
Tip:Some grinder assemblies should not be rinsed. Check the manual before putting any grinder part near water.
Check: The removable parts are clean, dry, and seated in their correct positions; the machine is free of packaging and loose debris.
Step 2: Install the correct filter
Open the filter basket and fit the filter type approved for your model. Use a paper filter in the specified shape or the machine’s supplied reusable filter. Set it flat in the basket so it cannot fold over the outlet. If the manual says to rinse a paper filter first, do so and empty the rinse water from the carafe.
Tip:Do not stack a paper filter inside a reusable filter unless the manufacturer specifically permits it. Extra layers can slow drainage and cause overflow.
Check: The filter sits open and flat in the basket, with no edges blocking its opening or the basket’s outlet.
Step 3: Add fresh water
Fill the reservoir with cold, fresh drinking water to the marking for the number of cups you want to brew. Use the reservoir’s level markings or the measuring method in the manual. Close the lid, and wipe up any water spilled on the counter or machine.
Tip:Use filtered water if your tap water has a strong taste or your manual recommends it. Never add hot water unless the manufacturer directs you to.
Check: The water is below the maximum fill line, and the amount matches the batch size you plan to brew.
Step 4: Load whole beans
Open the bean hopper and add fresh, dry whole beans, staying below its maximum fill line. Close the hopper lid fully. Start with the amount recommended in the manual or marked for your chosen batch size. Keep beans away from the water reservoir and do not add ground coffee to the hopper.
Tip:Very oily, flavored, or coated beans can leave residue or clog some grinders. Check the manual for bean restrictions; when unsure, use dry, medium-roast whole beans for the first pot.
Check: The hopper contains enough beans for the batch, its lid is closed, and no beans have fallen into the filter basket or water reservoir.
Step 5: Choose the brew size and grind setting
Set the machine to the same batch size as the water you added. Select the grinder setting and strength option, if available. For a first pot, use the machine’s normal or medium setting. If it has grind-size controls, start with the recommended drip-coffee setting in the manual; adjust only after tasting the result.
Tip:Grind and strength labels differ between machines. Use the manual’s recommendations as your starting point instead of assuming a setting number means the same thing on every model.
Check: The selected batch size matches the reservoir, and the grinder and brew settings are set for a standard first pot.
Step 6: Start the brew cycle
Place the empty carafe under the basket and confirm it is aligned with the machine’s warming plate or drip stop. Close the filter basket and any grinder cover. Plug in the coffee maker, then press the brew or start control. Stay nearby during the first cycle and watch for water or coffee escaping the basket.
Tip:Do not pull the carafe out while brewing unless your machine has a pause-and-serve feature. Returning it late or at an angle can cause drips or overflow.
Check: The grinder runs if enabled, water passes through the basket into the carafe, and no liquid leaks onto the counter.
Step 7: Let brewing finish and serve
Wait until the machine signals that brewing is complete or the flow into the carafe stops. Let the basket drain for a short time, then lift the carafe by its handle and pour into a mug. Use caution around hot coffee, steam, the warming plate, and the basket.
Tip:If the coffee tastes too strong or weak, change one setting on the next pot, such as the coffee amount or strength control. Keep the water amount the same while you compare results.
Check: The carafe holds brewed coffee, the cycle has stopped, and the filter basket has finished dripping before you remove it.
Step 8: Switch off and clean the machine
Turn the machine off and unplug it if the manual recommends unplugging after use. Let hot parts cool. Discard used grounds and the paper filter, or empty and rinse the reusable filter. Wash the carafe and basket as directed. Brush loose grounds from the grinder area only as the manual permits; do not pour water into the hopper or grinder. Wipe the warming plate and exterior after they cool.
Tip:Clean grounds and coffee residue promptly. Leaving wet grounds in the basket or hopper can cause stale odors and make the next brew taste off.
Check: Used grounds and filters are removed, washable parts are clean, and the machine is dry and ready for storage or the next brew.
Common Mistakes to Avoid
- Filling the reservoir and hopper for different batch sizes. — Match the water amount and brew setting, then add the corresponding bean amount recommended by the manual.
- Using the wrong filter or letting it fold over. — Use the filter type specified for the model and seat it flat in the basket before adding beans or brewing.
- Adding oily or flavored beans without checking compatibility. — Review the manual’s bean guidance and start with dry whole beans that are not coated or flavored.
- Pouring water into the hopper or rinsing electrical grinder parts. — Add water only to the reservoir and clean grinder components only by the method allowed in the manual.
Troubleshooting
Problem: The coffee maker does not start.
Solution:
Check that the plug is fully seated, the outlet works, the carafe is in position, and all required lids and baskets are closed. Confirm that the machine is not waiting for a delayed start. Consult the manual for indicator lights or reset instructions.
Problem: The grinder runs but little or no coffee reaches the carafe.
Solution:
Turn off and unplug the machine, then wait for hot parts to cool. Check that the basket and filter are seated correctly and that the outlet is not blocked by folded paper or compacted grounds. Clear grounds only as described in the manual. Do not reach into a grinder while it is connected to power.
Problem: Coffee overflows the basket or drips around it.
Solution:
Stop the brew if safe to do so. After the machine cools, check for an overfilled basket, a doubled filter, a filter folded across the outlet, or grounds clogging the basket. Use the correct filter and batch size, then try again.
Problem: The coffee tastes weak, bitter, or uneven.
Solution:
Check that the filter basket drained freely and that the water and bean amounts matched the chosen batch size. For the next pot, adjust one variable at a time: increase the coffee amount or choose a stronger setting for weak coffee; reduce the amount or choose a milder setting for overly strong coffee. Clean the basket and grinder area as the manual directs.
What Success Looks Like
The completed brew is a pot of coffee collected in the carafe, with no water or coffee leaking from the machine and no grounds in the cup. The cycle has ended, the controls show standby or off, and used grounds and filters have been removed after the parts cool. A first pot may need adjustment to suit your taste; consistent brewing at the selected batch size and a freely draining basket show that the setup is working.
Next Steps
Record the bean type, batch size, and settings you liked so you can repeat the result. Empty the hopper if the manufacturer recommends storing beans elsewhere, and keep beans sealed in a cool, dry place. Follow the manual’s schedule for descaling and grinder maintenance, especially if water leaves mineral deposits or the machine’s flow slows. Unplug the machine before cleaning and contact the manufacturer if it repeatedly leaks, overheats, or fails to grind after basic checks.
Frequently Asked Questions
How many coffee beans should I add?
Use the amount recommended in the manual for your selected water volume or cup setting. Bean and cup markings vary by model, so begin with the maker’s chart and adjust after tasting.
Can I use pre-ground coffee in a coffee maker with a built-in grinder?
Many models allow it if you turn off the grinder and put grounds in the filter basket. Check the manual for the correct amount and setting. Never pour ground coffee into the bean hopper.
How often should I clean the grinder?
Remove loose grounds as often as the manual directs, and clean more often if the grinder clogs or coffee oils build up. Follow the manufacturer’s method because some grinder parts must stay dry.
Why is my first pot not as hot as expected?
The machine may have a warming plate setting or a first-use rinse procedure that affects heat. Check the manual, confirm the cycle completed, and serve the coffee promptly. Do not heat the carafe directly unless the manufacturer says it is safe.
Evergreen bestsellers Picks

Roborock Qrevo S Pro Robot Vacuum and Mop with 18,500 Pa Suction

Dyson Airwrap i.d. Multi-Styler with Bluetooth Connectivity

Dyson V8 Cyclone Cordless Vacuum
As an affiliate, we earn on qualifying purchases.