

Microfoam’s silky texture is essential for elevating your coffee game. By mastering the right balance of heat, steam, and air, you can create that perfect frothy layer for lattes and cappuccinos. Avoid common mistakes like overheating milk and using dirty equipment to guarantee smooth results. Different types of milk yield varying frothing qualities, so it’s worth experimenting. Keep perfecting your technique, and you’ll discover even more ways to enhance your coffee experience.
Key Takeaways
- Microfoam enhances coffee texture and flavor, essential for lattes, cappuccinos, and flat whites, and is vital for latte art.
- Creating microfoam requires precise heating, steaming, and aerating techniques, typically at around 150°F (65°C).
- Different milk types affect frothing; whole milk yields creaminess, while alternatives like oat and almond need unique approaches.
- Common mistakes include using cold milk, over-frothing, and overheating, which can ruin texture and sweetness.
- Quality tools and smart gadgets can improve frothing consistency and elevate the overall coffee experience.

Zulay Kitchen Powerful Milk Frother Wand With 2 Duracell Batteries – Ultra Fast Handheld Drink Mixer – Electric Whisk Foam Maker for Coffee, Lattes, Cappuccino, Matcha, Hot Chocolate & Creamer – Black
MAKE RICH, CREAMY FROTH IN SECONDS: We coffee lovers are serious when it comes to our coffee. The…
As an affiliate, we earn on qualifying purchases.
As an affiliate, we earn on qualifying purchases.
Understanding Microfoam: Definition and Importance

Microfoam is a key element in crafting the perfect coffee experience. You’ll find that its silky texture and rich, creamy consistency elevate your beverages, providing a delightful mouthfeel. One of the major microfoam benefits is its ability to enhance flavor, as the tiny air bubbles create a harmonious blend with espresso. Plus, it adds an aesthetic appeal, making your latte art pop.
In terms of microfoam applications, you can use it for lattes, cappuccinos, and even flat whites, allowing for endless creativity in your coffee creations. Whether you’re at home or a café, mastering microfoam can transform your coffee routine into something truly special. Enjoy experimenting and discovering the unique qualities it brings to your favorite drinks!

Rancilio Silvia (V1/V2) Steam Wand
Rancilio Silvia (V1/V2) Steam Wand
As an affiliate, we earn on qualifying purchases.
As an affiliate, we earn on qualifying purchases.
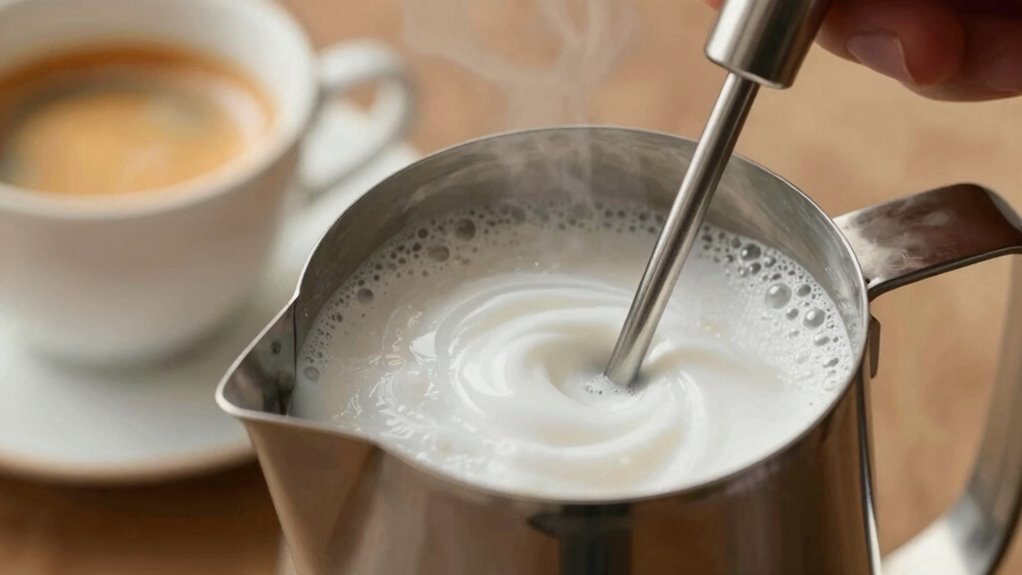
The Science Behind Microfoam Creation

Creating microfoam involves a delicate balance of heat, steam, and air. To achieve that perfect texture, you need to take into account three key factors:
- Milk Temperature: Heating milk to the right temperature enhances milk proteins’ ability to trap air, creating stable bubbles.
- Steam Pressure: The right steam pressure helps incorporate air without overloading the milk, vital for achieving the desired bubble size.
- Frothing Techniques: Mastering specific frothing techniques guarantees a smooth, velvety texture that holds up well in beverages.
For those exploring dairy alternatives, the science remains fundamental. Each option interacts differently with steam and temperature, impacting foam stability. A careful texture analysis of your microfoam can make all the difference in your drink’s overall experience.

HOFASON Stainless Steel Milk Frothing Pitcher Cappuccino Pitcher Pouring Jug Espresso Cup Creamer Cup for Latte Art, 12 Ounce (350 ML)
TOP QUALITY – The frother pitcher is made of #304 stainless steel with non-stick teflon coating, ust-proof, stain-proof…
As an affiliate, we earn on qualifying purchases.
As an affiliate, we earn on qualifying purchases.
Top 5 Mistakes to Avoid When Frothing Milk
When you’re frothing milk, avoiding common mistakes can make all the difference in achieving that perfect microfoam. First, don’t use cold milk; it won’t froth well. Second, make sure your milk frothing equipment is clean; any residue can ruin the flavor and texture. Third, avoid over-frothing; this leads to dry, airy bubbles instead of creamy microfoam. Fourth, don’t forget to stretch the milk; immerse the steam wand properly to incorporate air without splashing. Finally, be mindful of the temperature; overheating milk kills the sweetness and texture you’re aiming for. By steering clear of these common frothing errors, you’ll enjoy a velvety microfoam that elevates your coffee experience. Happy frothing!

2-Pack Latte Art Pen Set, Stainless Steel Coffee Drawing Tool with Wood Handle, Double-Ended Barista Accessories for Creating Professional Espresso Tools, Home & Travel & Cafe Use
Premium Material Composition: Crafted with high-quality stainless steel and wood, these latte art pens ensure durability and a…
As an affiliate, we earn on qualifying purchases.
As an affiliate, we earn on qualifying purchases.
Key Techniques for Frothing Milk to Microfoam Perfection
Achieving microfoam perfection requires a few key techniques that can elevate your coffee game. By mastering these methods, you’ll create frothed milk that’s creamy and velvety.
- Temperature Control: Heat your milk to around 150°F (65°C). Too hot can ruin the texture.
- Angle the Steam Wand: Position the wand at an angle to create a whirlpool effect. This helps incorporate air evenly, enhancing the microfoam.
- Practice Aeration: Start with the wand submerged to create bubbles, then move it just below the surface to develop that silky foam.
Using Microfoam to Enhance Your Coffee Drinks

Microfoam isn’t just about texture; it transforms your coffee drinks into a creamy delight. With the right techniques, you can create stunning latte art that adds a personal touch to every cup. Let’s explore how microfoam can elevate your coffee experience. Additionally, understanding the mechanics of French press can enhance your overall appreciation for coffee brewing. Using the right super-automatic espresso machines, you can achieve consistent microfoam that takes your drinks to the next level. Mastering the milk steaming techniques is essential for creating that velvety texture that complements your espresso perfectly, as proper grind size plays a crucial role in achieving the perfect extraction. Regular practice of safe movement basics can also improve your overall skill in creating great coffee drinks.
Microfoam Texture Benefits
While many coffee enthusiasts appreciate a rich, bold flavor, the texture of your drink can elevate the experience even further. Microfoam creates a velvety mouthfeel that transforms your coffee into a luxurious treat. Here are three key benefits of using microfoam:
- Microfoam Health Benefits: The creaminess can help you enjoy smaller, less sweetened drinks, promoting healthier choices.
- Microfoam Flavor Enhancement: Its silky texture amplifies the coffee’s natural flavors, making each sip more enjoyable.
- Improved Mouthfeel: The light, airy bubbles offer a unique sensory experience that pairs beautifully with espresso.
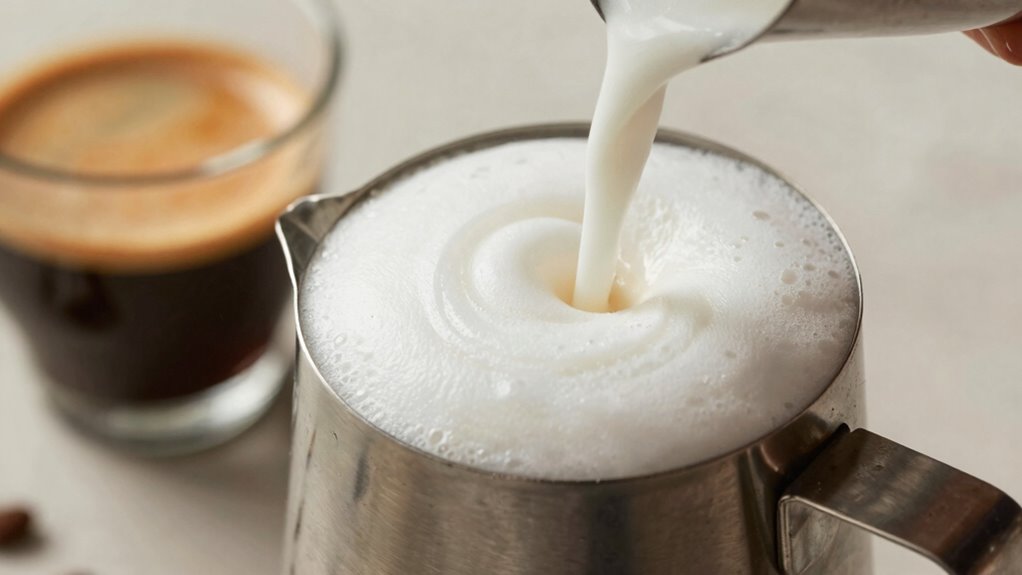
Latte Art Techniques
Creating stunning latte art involves mastering a few essential techniques that can elevate your coffee experience. Start with the latte art basics: guarantee your microfoam is velvety and silky, as this will make your designs stand out. Once you’ve perfected the texture, focus on your pouring techniques. Begin by pouring from a height to establish a base, then drop closer to the cup to create shapes. For a heart, tilt the cup slightly and pour slowly while moving in a circular motion. For a rosette, wiggle the pitcher as you pour and finish with a straight line. Additionally, the color accuracy of your coffee presentation can enhance the visual appeal of your latte art. Practice is key, so don’t be afraid to experiment. With time, you’ll create impressive designs that enhance your coffee drinks.
Microfoam vs. Regular Foam: What’s the Difference?

Although many enjoy the creamy texture of both microfoam and regular foam, their differences can greatly impact your coffee experience. Here’s what sets them apart:
Many appreciate the creamy textures of microfoam and regular foam, yet their differences can significantly enhance your coffee experience.
- Texture: Microfoam is velvety and silky, while regular foam is often airy and bubbly.
- Milk Types: Microfoam typically requires whole milk or specific alternatives that froth well, whereas regular foam can be made with a variety of milk types, including low-fat options.
- Frothing Techniques: Achieving microfoam demands precise frothing techniques, like using a steam wand at the right angle, while regular foam can be created with simpler methods.
Understanding these distinctions helps you choose the right foam for your drinks, enhancing your overall enjoyment.
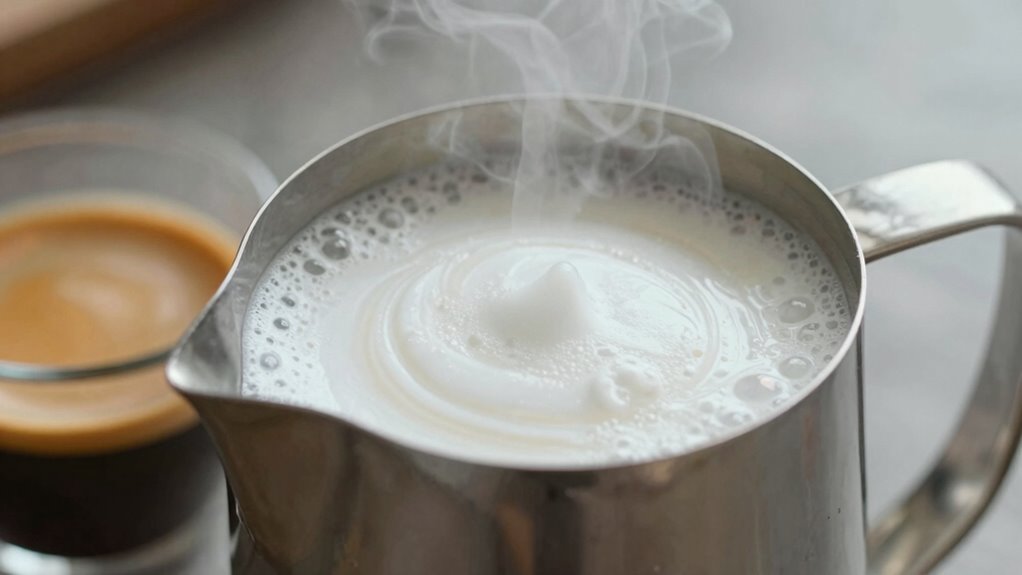
Tips for Maintaining Temperature and Texture in Microfoam
To enjoy the full benefits of microfoam, maintaining the right temperature and texture is key. Start by ensuring your milk is cold before frothing; this helps with temperature control. Heat your milk to around 150°F for ideal microfoam, as overheating can compromise texture stability. Use a thermometer to monitor the temperature accurately. When frothing, create a whirlpool motion in your pitcher to incorporate air evenly, which helps develop that silky texture. Don’t rush the process; take your time to achieve the right consistency. Finally, serve your microfoam immediately to preserve its velvety texture. Remember, a little practice goes a long way in mastering the art of microfoam. Enjoy your perfectly crafted beverages!
Choosing the Best Milk for Microfoam
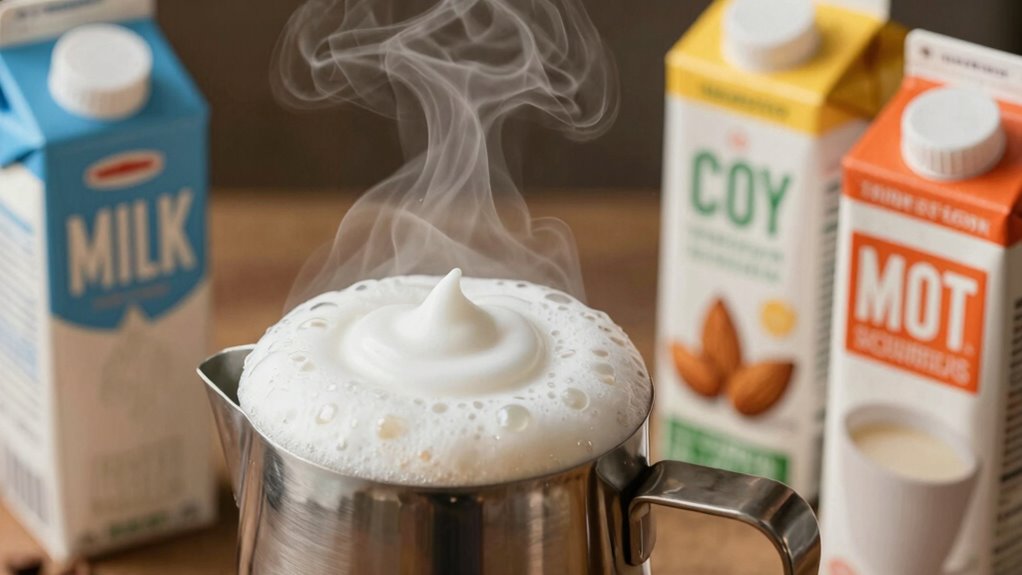
What makes some milk better for microfoam than others? The key lies in several important factors that affect your frothing experience. Here are three vital aspects to take into account:
- Milk Types: Whole milk is often preferred for its creamy texture, while skim milk can create a lighter foam. Aloe vera juice is also known for its smooth consistency, making it an interesting alternative for unique froth experiences. The choice of milk can significantly impact your cooking techniques, enhancing the overall flavor and texture of your beverages. Additionally, understanding milk frothing techniques can help you achieve the perfect microfoam. The use of smart kitchen gadgets can also streamline the frothing process, ensuring consistency.
- Fat Content: Balancing fat content is essential; too much can weigh down the foam, while too little may not froth well.
- Dairy Alternatives: If you’re lactose intolerant, options like oat or almond milk can work, but they vary in frothing temperature and flavor profile.
Always prioritize milk freshness to achieve the best microfoam. Mastering the steaming technique will help you create a velvety texture, regardless of the milk type you choose! Additionally, using essential oils for relaxation can enhance the overall coffee experience by providing a calming atmosphere while you froth.
Frequently Asked Questions
Can I Make Microfoam With Non-Dairy Milk Alternatives?
Yes, you can make microfoam with non-dairy milk alternatives! Many non-dairy options, like oat or almond milk, froth well using the right techniques. To achieve that velvety texture, heat your milk to around 150°F and use a steam wand or frother. Experiment with different brands, as some froth better than others. With practice, you’ll create delicious, creamy microfoam for your favorite coffee drinks, just like with dairy milk!
How Long Does Microfoam Last After Being Created?
Microfoam typically lasts about 30 minutes after being created, but its stability can vary based on the ideal temperature. If you keep it around 120°F (49°C), it’ll maintain its texture longer. However, as it cools, the microfoam can lose its creamy consistency and become more liquid. To enjoy it at its best, use it right after frothing and avoid letting it sit too long.
Is Microfoam Safe for People With Lactose Intolerance?
Microfoam can be a safer choice for those with lactose intolerance. Notably, about 65% of adults worldwide have some form of lactose intolerance. When you enjoy microfoam, the digestion process is often smoother because it’s typically made from steamed milk, which can break down lactose. However, if you’re highly sensitive, it’s best to choose lactose-free options to avoid any discomfort. Always listen to your body’s reactions after you indulge!
What Equipment Do I Need for Home Microfoam Preparation?
To prepare microfoam at home, you’ll need an espresso machine with a steam wand. If you don’t have one, a handheld frother or steam pitcher works too. Use fresh, cold milk for the best results. For steam wand techniques, angle the wand slightly and submerge it just below the surface. For milk frothing tips, create a whirlpool effect to incorporate air smoothly. Practice makes perfect, so don’t hesitate to experiment!
Can I Reuse Microfoam From Previous Drinks?
You can’t really reuse microfoam from previous drinks. Once it’s been poured, the microfoam quality diminishes quickly due to air exposure and temperature changes. If you try to store microfoam, it’ll lose its creamy texture and become watery. It’s best to make fresh microfoam for each drink to guarantee you get that velvety consistency. So, whip up a new batch every time you’re ready to enjoy your coffee creations!
Conclusion
In the world of coffee, microfoam is your secret weapon, transforming each cup into a velvety masterpiece. By mastering the art of frothing, you’re not just crafting drinks; you’re creating experiences that dance on the palate. Embrace the science and artistry behind it, and let your coffee creations soar like a perfectly frothed cloud. So, grab your steam wand and elevate your brewing game—because every sip deserves to be a celebration of flavor and texture.