
TL;DR
Coffee brewing accessories help you control measurements, grind, temperature, pouring, and filtration, which makes it easier to repeat a cup you enjoy. Start with a brewer, fresh beans, matching filters, and a way to measure by weight; add a burr grinder and method-specific tools as your routine calls for them. A common starting ratio is 1:15 to 1:17 coffee to water, and many hot-brew methods work well around 90–96°C (195–205°F).
A small kitchen scale can do more for your morning coffee than a shelf of shiny gadgets. If you weigh your beans and water, you can make the same recipe tomorrow, spot what changed, and adjust with purpose.

Get coffee and tea gear delivered free with Prime
- Fast, free delivery on millions of items
- Prime Video, Amazon Music and more included
- Member-only deals all year
Coffee brewing accessories help you manage the variables that shape a cup: grind size, water temperature, contact time, and how evenly water reaches the grounds. You’ll learn what to buy first, which tools fit each brewing method, and how to choose equipment you’ll actually use. The goal is a better cup with less guesswork—not a crowded counter.
Start with a brewer, matching filters, fresh beans, and a way to measure coffee and water by weight.
A burr grinder is a useful next upgrade if you brew regularly and want more control over aroma and grind size.
Try a 1:15 to 1:17 coffee-to-water ratio and water around 90–96°C (195–205°F) as starting points for many hot-brew methods.
Choose paper filters for a cleaner cup and metal filters for more oils and body; both need the right fit and care.
Buy accessories to solve a real routine problem, and clean and store your equipment so old oils and stale beans don’t spoil later cups.
Start With Four Basics Before You Buy More Gear
The first coffee brewing accessories you need are a brewer, any matching filter it requires, a way to measure coffee and water, and fresh beans. Together, these basics cover the essential jobs: holding the grounds, separating them from the drink, and giving you a recipe you can repeat. Specialized tools can make a specific step easier, but they have little value if you haven’t settled on a brewer or don’t enjoy the coffee you’re using.
Try a simple example: weigh 20 grams of coffee and 320 grams of water. That gives you a 1:16 coffee-to-water ratio, a useful starting point for many hot-brew methods. If the cup tastes too strong, adding water after brewing may soften it, but reducing the dose next time changes the recipe itself. If it tastes thin, increasing the dose is one possible adjustment. Keeping the amounts in grams helps you compare those changes; scoops and cup markings can vary with bean size and how tightly the coffee settles.
Fresh beans matter because coffee loses aroma over time, especially after grinding. A costly brewer can’t restore those aromas, so it often makes sense to spend first on beans you like and a simple way to measure them. Then choose pieces that fit your kitchen and routine. A compact dripper and paper filters are easy to store, while a French press needs room to rinse its carafe. Think about counter space, replacement-filter availability, and cleaning before buying. The best setup is the one you’ll reach for on a sleepy Tuesday morning.
- Start with fresh beans in a sealed, dry container.
- Use your existing brewer if it makes coffee you like; a new one is useful when it solves a specific limitation.
- Measure by weight so a successful recipe can be repeated and adjusted.
These are practical choices, not rules carved in stone. If you brew for one person, a small pour-over may suit you; if the whole household wants coffee at once, a larger brewer may save time. The right first purchase depends on what currently makes brewing harder, not on how many accessories a setup is supposed to have.
Products Worth Considering

Cuisinart Freeze Ease Automatic Ice Cream Maker, 1 Quart

De'Longhi Magnifica Duo Fully Automatic Espresso Machine with Milk Frother, Silver

Ninja Foodi Smart 6-in-1 Indoor Grill and Air Fryer, 4 Qt, FG551
As an affiliate, we earn on qualifying purchases.
Buy a Grinder When You Want More Aroma and Control
A grinder can improve your coffee by letting you grind beans just before brewing and choose a size that fits your method. Once beans are ground, more of their surface is exposed to air, so aroma fades faster than it does from whole beans. Grinding shortly before brewing helps preserve that aroma. Burr grinders usually produce more consistent grounds than blade grinders, which chop beans into a mix of fine dust and larger pieces. With a more even grind, water interacts with the coffee more consistently, making taste changes easier to interpret when you adjust a recipe.
Grind size changes extraction: finer grounds generally give water more surface to work on and can extract faster, while coarser grounds generally extract more slowly. A grind that is too fine for a method can also slow water flow or produce excess sediment; one that is too coarse may let water pass through before enough flavor is extracted. Imagine a French press made with very fine grounds: you may get extra sediment and a harsh, drying taste. A grind that is too coarse for a quick pour-over may leave the cup weak or sour. These are useful clues, not diagnoses: taste can also reflect water, coffee, and timing, so change one thing at a time.
If you brew daily but don’t want a large electric appliance, a hand burr grinder is a workable option. It takes a little effort, especially for espresso, but it can cost less and fit in a drawer. For someone who makes a single morning pour-over, that trade-off may feel worthwhile; for a busy household, an electric grinder may be easier to use consistently. If the extra effort means you skip grinding and stop using the tool, the theoretical improvement won’t help your routine.
Clean the grinder as its maker recommends, since old coffee particles and oils can affect the next batch and build up over time. Before buying, check whether the grinder offers settings suitable for your brewer and whether replacement parts or cleaning instructions are available. A grinder should make your routine better, not turn it into a maintenance project.
Use a Scale and Kettle to Repeat the Cup You Like
A coffee scale helps you repeat a recipe, and a suitable kettle helps you deliver water the way your brewer needs it. Together, they make it easier to control measurements and pouring instead of relying on a scoop and a fast splash. Weight matters because a scoop holds different amounts depending on bean size and how the grounds settle; a measured dose gives you a stable reference for changing the brew. For many hot-brew methods, 90–96°C (195–205°F) is a practical starting range, though some coffees and brewers suit temperatures outside it.
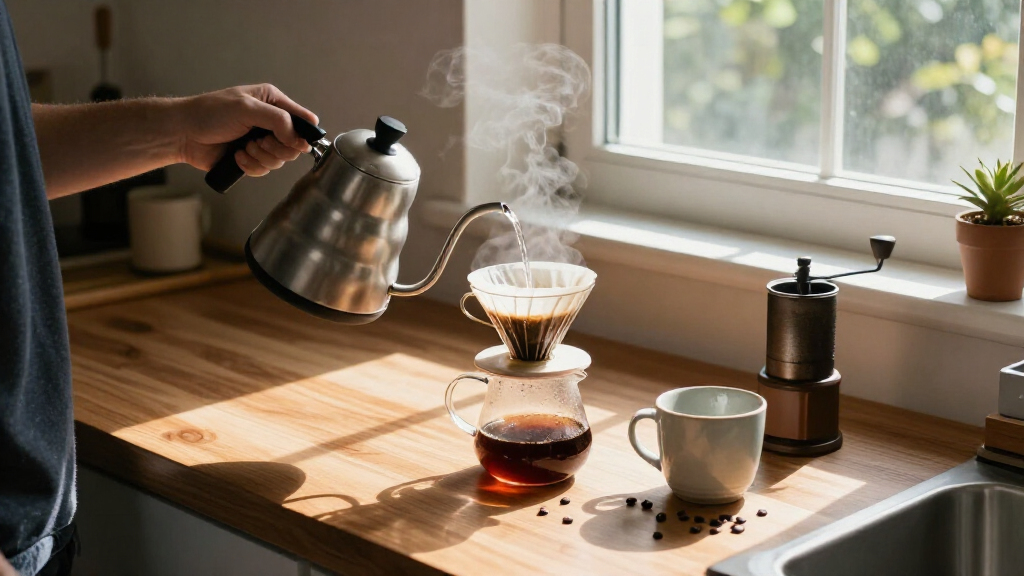
Suppose you like a pour-over you made on Saturday but can’t recreate it on Monday. If you wrote down 20 grams of coffee, 320 grams of water, and a roughly three-minute brew, you have a recipe to work from. A gooseneck kettle makes a slower, more directed pour easier, so it can help you wet the grounds evenly. More even wetting reduces the chance that water rushes through one area while leaving another less extracted. It is especially useful for pour-over, but you don’t need one for French press or many automatic brewers, where water distribution is handled differently.
Some kettles let you set an exact temperature. That convenience can help when you want to compare recipes or repeat one without waiting for water to cool, but it doesn’t guarantee a better cup: the coffee, brewer, and pour still matter. A basic kettle can serve plenty of home brewers. Let boiling water cool briefly if you have no temperature display, and use taste as your guide rather than chasing a single perfect number.
- Weigh the coffee dose and water so the starting recipe stays consistent.
- Begin with a ratio around 1:15 to 1:17 for many hot-brew methods; a stronger ratio uses less water for the same coffee dose.
- Use water near 90–96°C as a starting point, then judge the cup rather than treating the range as a rule.
- Record the recipe and change one variable on the next brew, so you can tell which adjustment made a difference.
That simple process turns “something tastes off” into a manageable adjustment. If your cup is bitter, a coarser grind or shorter brew may help; if it tastes weak, test a slightly finer grind or a different ratio. Since several variables affect flavor, changing only one at a time helps you learn what your own coffee and brewer respond to.
Choose a Filter That Matches the Cup You Want
Paper filters usually make a cleaner cup by holding back more oils and fine particles, while metal filters let more of them pass through for a fuller-bodied result. That difference affects texture as well as flavor: paper can make delicate notes easier to pick out, while oils and fine particles can give coffee more weight. Neither choice is automatically better. Your preferred cup, brewer, and willingness to clean all matter.
In a pour-over brewer, a paper filter can produce a bright, clear cup that lets delicate flavors stand out. A metal filter may suit you if you like a heavier texture, but you’ll need to rinse it thoroughly after each use; trapped oils and fine grounds can accumulate if it is neglected. French press coffee commonly uses a metal mesh plunger, so some sediment and oils are part of the style; check that the filter fits snugly and the screen stays clean. A damaged or poorly fitted screen can let more grounds through than you want.
Fit matters, too. A filter that folds awkwardly or slips out of place can let water bypass the coffee, leaving uneven results because some water barely contacts the grounds. Check the brewer’s recommended shape and size before buying a big box. If your local shop reliably stocks the filters you need, that convenience may beat a less common size or a reusable filter that is a hassle to maintain. Availability can determine whether the setup remains easy to use after the first purchase.
There’s a waste trade-off. Reusable metal filters reduce disposable paper use, but they need careful cleaning and have material and manufacturing impacts of their own. Paper filters are convenient and can make cleanup quick, though they create regular disposable waste. Picture your actual morning: if you’re rushing to get out the door, a filter you can toss may be the one you use properly. The most suitable choice balances the cup you want with the cleaning and replacement routine you can sustain.
Match Accessories to Your Brewer, Not a Shopping Trend
The right coffee brewing accessories depend on the brewer and the cup you want, since tools work as a system. A pour-over setup benefits from a dripper and matching filters; espresso needs a capable machine and grinder; French press coffee needs a carafe and plunger. These tools address different ways of brewing: water flow and filtration for pour-over, pressure and grind control for espresso, and steeping and separation for French press. Buying a tool designed for another method may add clutter without improving your brew.
| Brewing method | Useful accessories | What they help you control |
|---|---|---|
| Pour-over | Dripper, matching filters, scale, gooseneck kettle | Ratio, pour placement, and water flow |
| French press | Carafe, plunger, scale, timer | Dose and contact time |
| Espresso | Capable machine, burr grinder, tamper, scale | Grind, dose, and extraction |
| Automatic drip | Compatible filters, scale, clean water | Ratio and routine consistency |
For instance, a gooseneck kettle can help you steer a pour-over, but it won’t add much to a French press routine. A tamper matters for espresso because you compress the coffee in a portafilter; it has no role in a paper-filter dripper. That’s why a method-specific shopping list beats a trend list.
Before you buy, ask whether the accessory works with what you own, fits your budget, and is easy to clean. A connected scale or app may record recipes and measurements, but a notepad can do the same job. More elaborate equipment can make diagnosis easier; it can also make a quick cup feel like homework. Think about whether the tool will change a step you actually struggle with: if it only duplicates a task you already handle well, its likely benefit may not justify the cost, counter space, or upkeep.
Protect Your Coffee With Better Storage and Simple Cleaning
Good storage and regular cleaning help your coffee taste fresh from one brew to the next. Keep beans sealed in a cool, dry, dark place, away from heat and sunlight. Air, moisture, heat, and light can speed the loss of desirable aromas, so an airtight container is useful; vacuum features are optional, and repeatedly opening a large container can expose the beans to air and moisture.
If you buy a large bag, you can freeze portions in airtight packaging and thaw each portion before opening it. For example, divide a bag into small amounts you can finish in a few days instead of moving the entire bag in and out of the freezer. That makes storage easier to manage and limits repeated exposure to changing temperatures and moisture. Avoid opening a cold, frozen portion while moisture can collect on the beans.
Cleaning also protects flavor. Coffee oils can linger on a French press screen, dripper, or grinder parts, then turn stale and affect later brews. Rinsing gear removes loose grounds, while washing helps remove oils that plain water may leave behind. Let parts dry fully to limit lingering moisture, and remove oils regularly according to the manufacturer’s instructions. Descale kettles and coffee machines when needed, especially if your water leaves mineral deposits; mineral buildup can affect how equipment heats or moves water.
Picture a press that sat unwashed overnight: its mesh may look clean at a glance, but a greasy film can cling to the screen. A proper wash and rinse can make the next pot taste clearer. Follow equipment instructions for cleaning products and parts; don’t assume every filter, seal, or grinder component is dishwasher-safe. A manageable cleaning routine protects flavor without making each brew feel like a chore.
Spend on the Accessory That Fixes Your Biggest Frustration
The best accessory is the one that solves a problem you notice in your own routine. If one day’s coffee tastes different from the next, start with a scale. If pre-ground coffee loses its aroma before you finish the bag, consider a grinder. If pour-over water floods one side of the coffee bed, a gooseneck kettle may help you control the pour. In each case, the tool gives you more control over a particular variable, which makes it easier to see whether that variable is behind the problem.
Ask what you want your cup to taste and feel like. Paper filters can make a cleaner cup; metal filters often keep more oils and sediment for a fuller body. A slower, more careful pour may suit a weekend ritual, while an automatic brewer may work better when you need several cups before work. The “best” setup changes with your budget, available space, and willingness to clean it. Those trade-offs matter because an accessory that is inconvenient to use or maintain can undermine the consistency it was meant to provide.
Think about durability and replacement parts before buying. Check filter availability, cleaning instructions, and whether an accessory will work with your current brewer. A sturdy, simple tool you use every morning can serve you better than a precise gadget that spends the week in a cupboard. More precise gear can help you diagnose an inconsistency, but it can’t choose your taste for you; measurements make a recipe repeatable, while your preferences determine which repeatable cup is worth keeping.
Try this small challenge: for a week, write down the coffee dose, water amount, brew time, and one note about taste. Then add only the accessory that would make the biggest difference to what you recorded. If the notes show inconsistent amounts, a scale could help; if the amounts stay steady but the cup varies, grind or pouring may be worth investigating. That way, the variables you can control become useful clues, and each purchase has a job to do.
Frequently Asked Questions
What coffee accessories do I need to get started?
You need a brewer, matching filters if required, fresh beans, and a way to measure coffee and water. A kitchen scale makes it easier to repeat a recipe; a grinder is a worthwhile next addition if you brew often.
Is a burr grinder worth it?
Usually, if you brew regularly and want more consistent grounds. A good hand burr grinder can cost less and take up less space than an electric model, though it takes effort to grind.
Do I need a gooseneck kettle?
A gooseneck kettle helps you pour slowly and accurately for pour-over coffee. It isn’t necessary for French press, cold brew, or many automatic brewers.
Should I use paper or metal filters?
Paper filters typically make a cleaner cup by holding back more oils and fine particles. Metal filters let more oils and some sediment through, giving coffee more body; clean them thoroughly after use.
What is a good coffee-to-water ratio?
About 1:15 to 1:17 by weight is a useful starting point for many hot-brew methods. For example, 20 grams of coffee at 1:16 takes 320 grams of water; espresso uses a different approach.
What water temperature should I use?
For many hot-brew methods, start around 90–96°C (195–205°F). Taste the result and adjust, since the brewer, coffee, and recipe can change what works best.
How should I store coffee beans?
Keep beans sealed in a cool, dry, dark place, away from heat and sunlight. If freezing portions, seal them airtight and thaw a portion before opening it.
Conclusion
Build your setup around the cup you enjoy and the morning you actually have. Start with fresh beans, a brewer, matching filters, and a scale; add a burr grinder or method-specific tool when you can name the problem it will solve.
Write down one recipe, make it again, and adjust one thing at a time. Good coffee doesn’t need a gadget parade—just a few well-chosen tools and a little attention, like a steady hand pouring into a warm mug.